Description
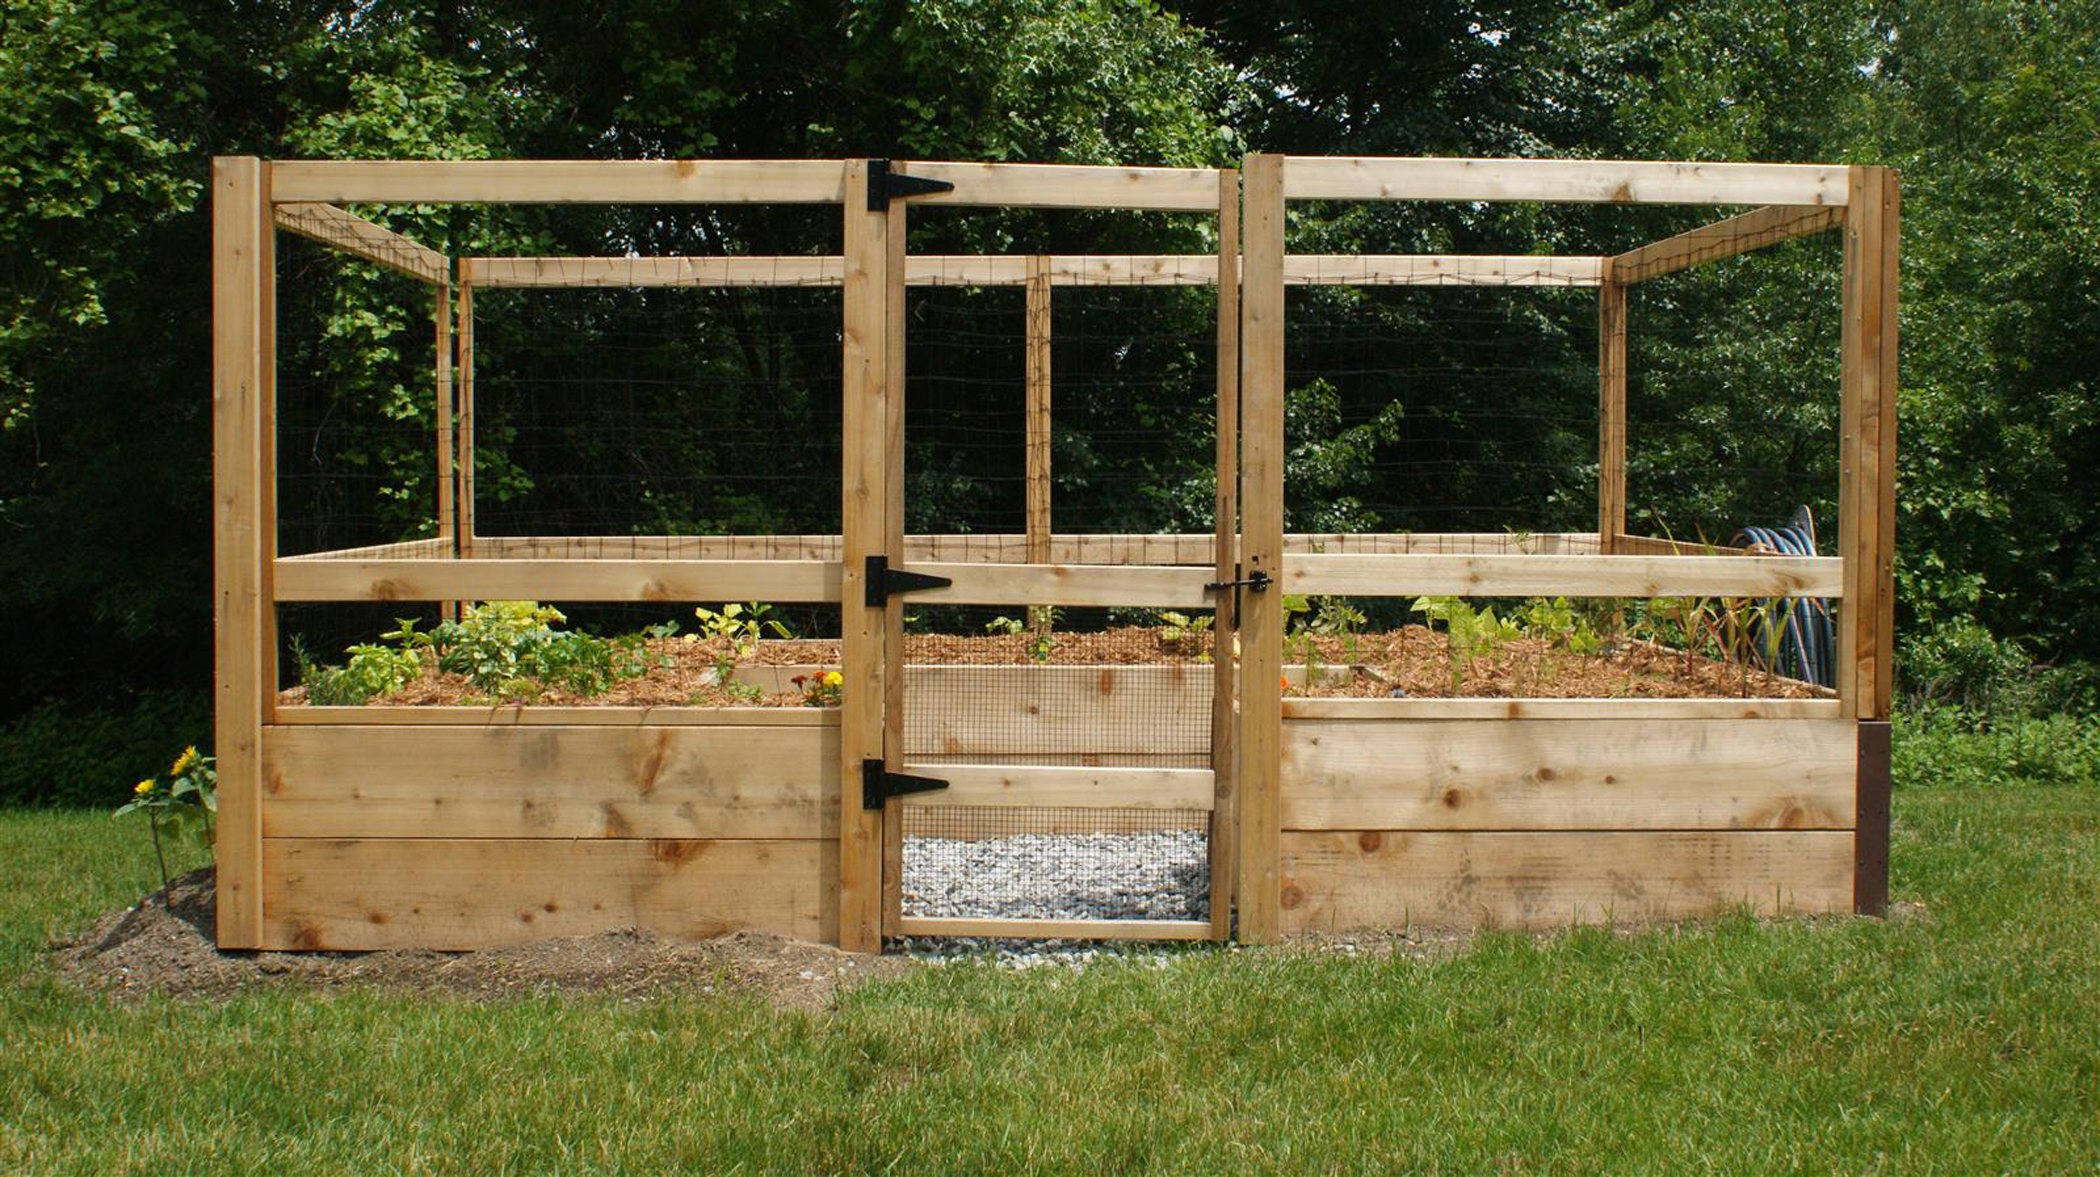
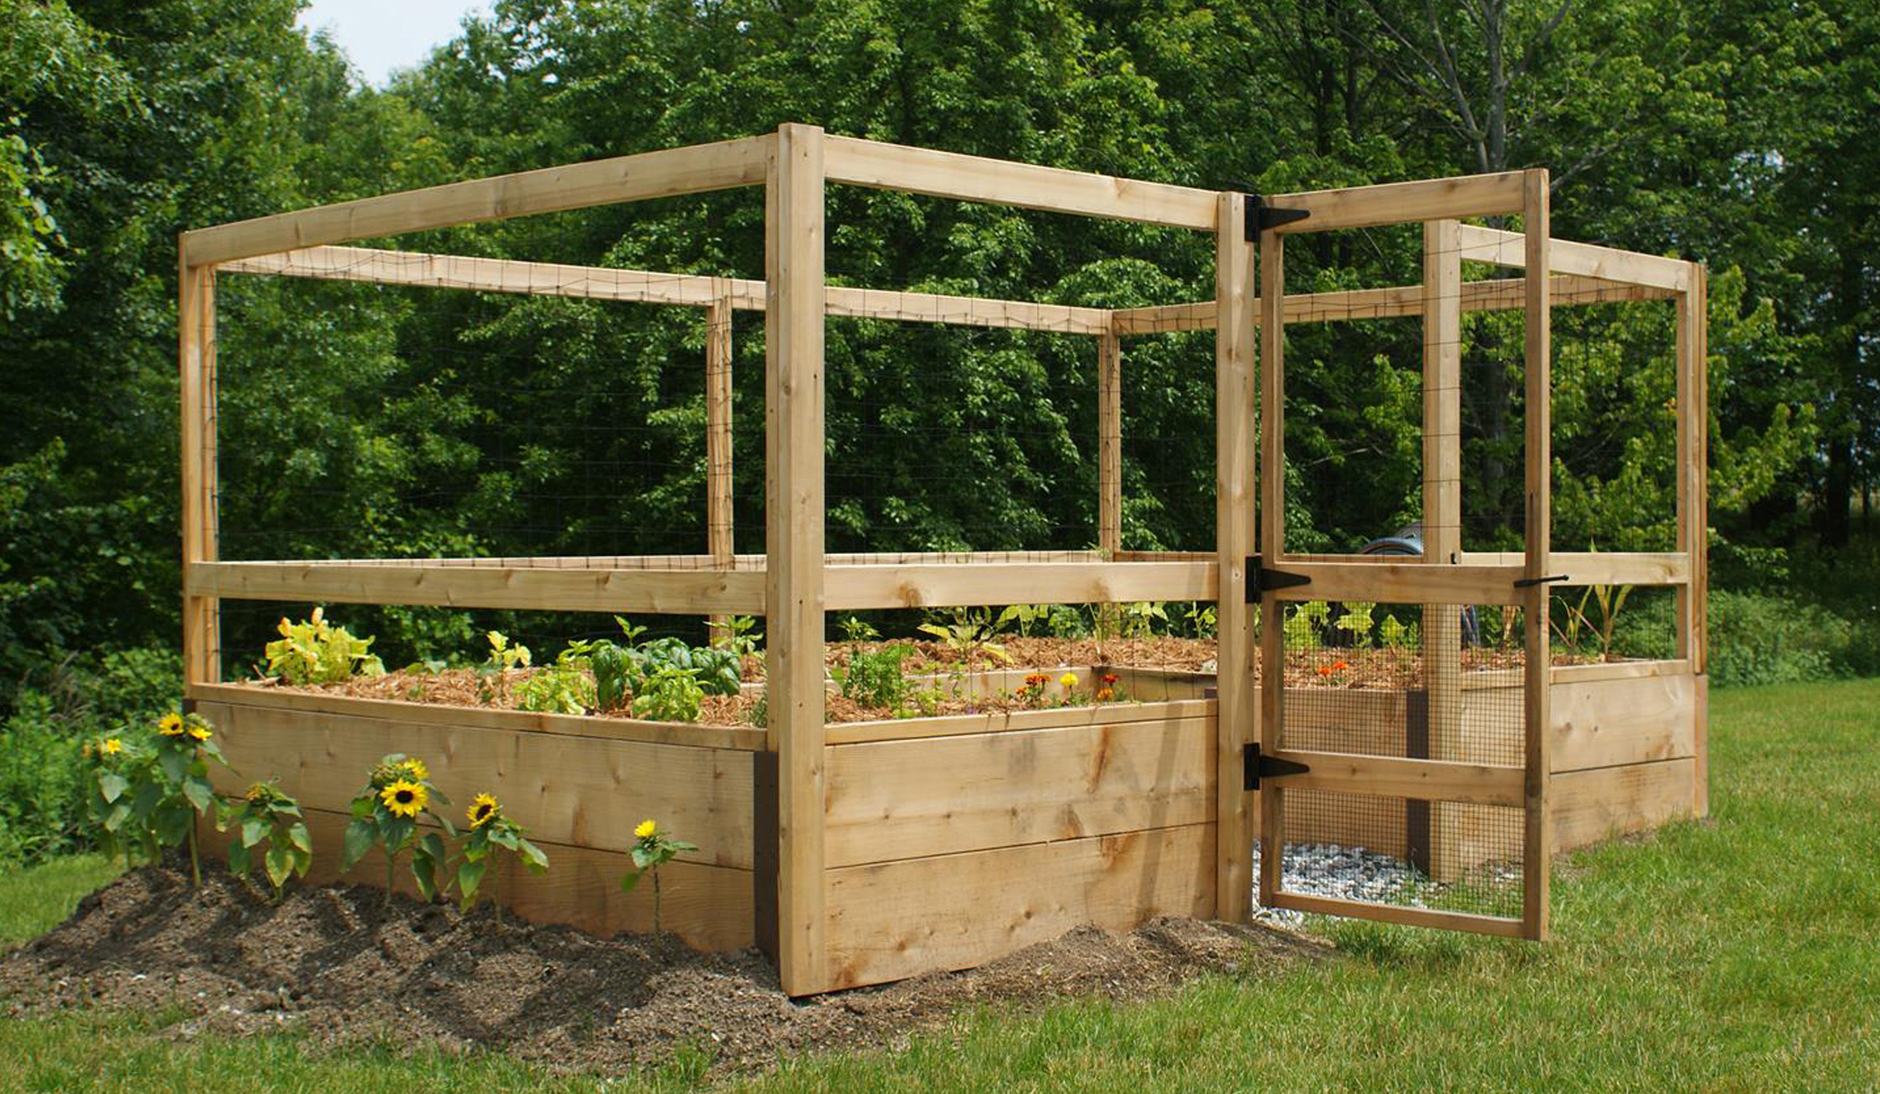
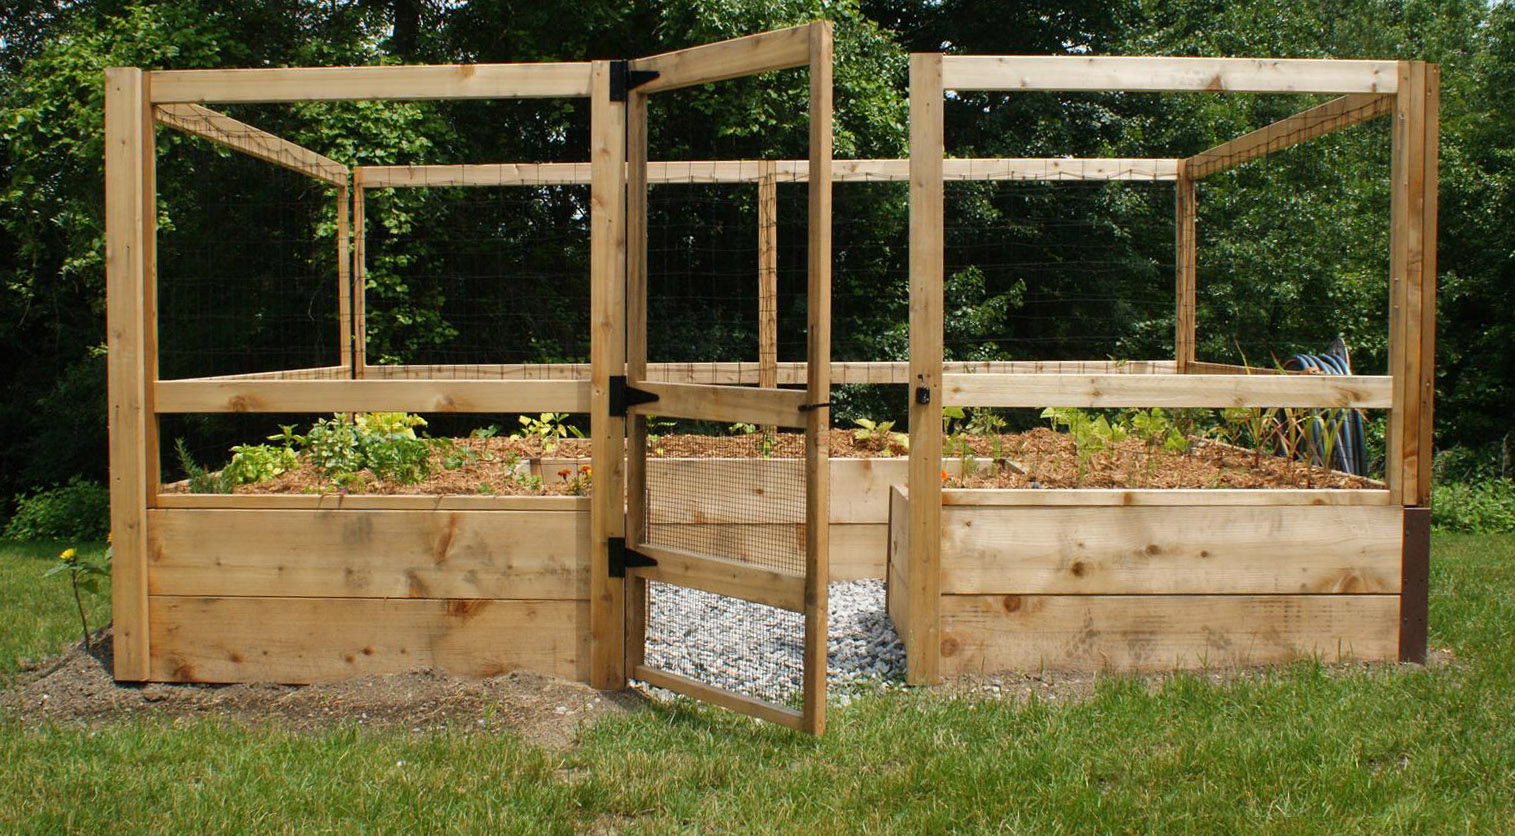
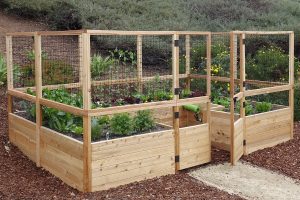
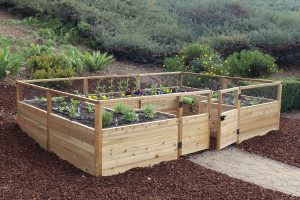
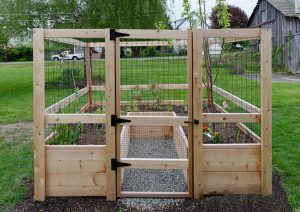
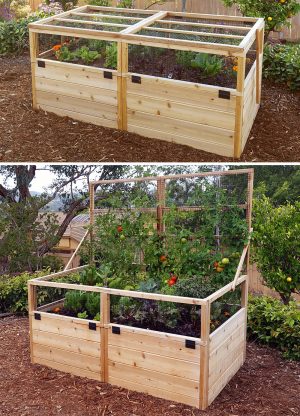
About the 8’x12′ Just-Add-Lumber Deer-Proof Vegetable Garden
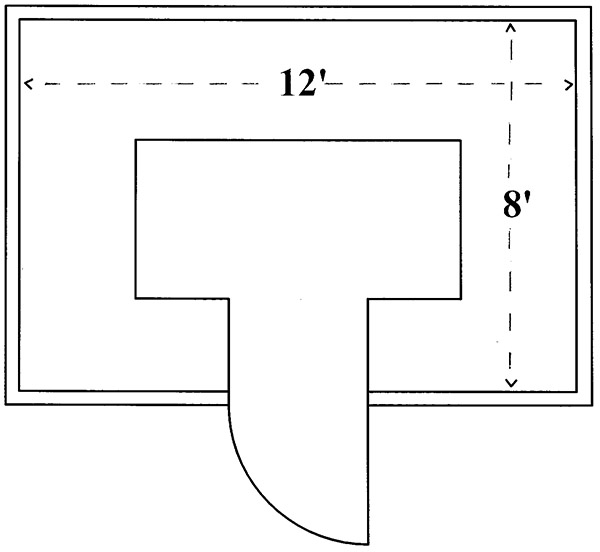
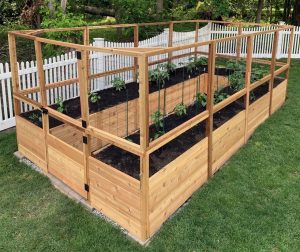
Save money by buying your own lumber locally. Our “lumberless” garden kits enable you to build gardens nearly identical to our Complete Fenced Vegetable Garden Kits. We provide Raised Garden Bed Brackets, all necessary hardware, black netting for the trellis and fencing, and a complete set of detailed instructions and plans. Just like our Complete Fenced Garden Kits, our “lumberless” garden kits keep out rabbits and dogs. Of course, our instructions list the lumber boards you’ll need to purchase as well as the exact sizes the lumber boards will need to be cut to. If you don’t have a saw, ask the lumber company to cut the lumber pieces for you. This garden provides approximately 65 square feet of planting space and is recommended for families of 5-6 people.
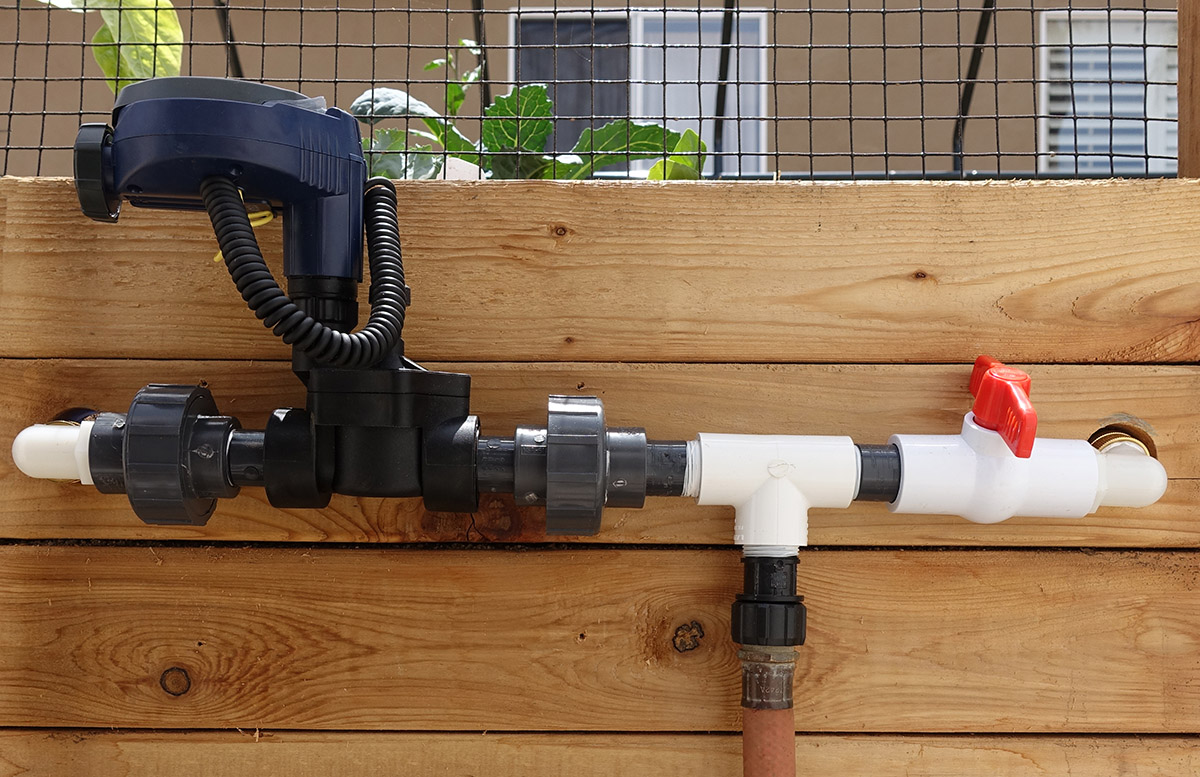
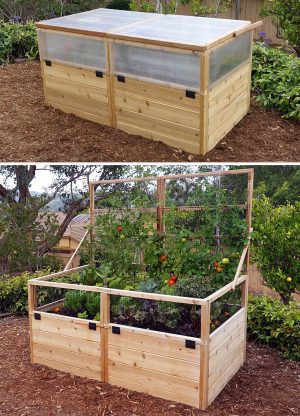
Optional Automatic Watering System
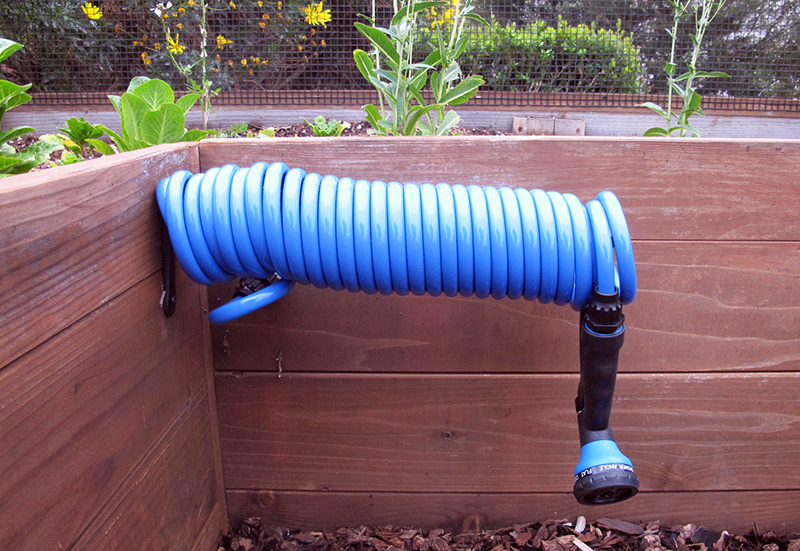
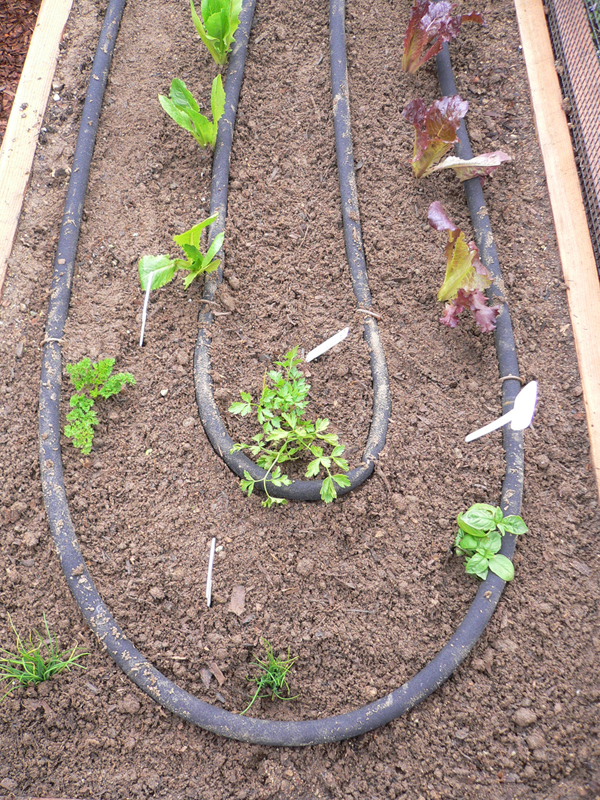
An automatic soaker hose irrigation system takes even the simplest of duties out of your hands. We use a digital battery operated controller, manufactured by DIG Corporation, that is very easy to use. You can attach a garden hose to the inlet fitting, or connect it to your underground piping. When the controller turns on, water seeps out through the 75′ soaker hose (hose stakes included). You’ll never need to worry about watering your garden-it takes care of itself. We also include a coil hose and hose holder along with a vegetable sprayer. You can manually spray your plants if you choose to, or use the hose to wash your hands. The coil hose is conveniently mounted in the walkway of the fenced garden.
Scott S (verified owner) –
This was an excellent product in all areas. I am very pleased how it turned out and how much space it offers, all while protected from wildlife.
I built the whole thing myself over a few weekends ( I am a dad with two kids and other projects).. I am reasonably handy and was up to the task. Looking back on the build, and the thing that bit me most in terms of lost time, was to identify the spot where this thing will go. If it will be largely flat, then you will be in good shape and there may not be much work to do. If you plan to build this into a small incline or ridge, add another two feet in the incline areas so that you have clearance to use your drill and drive screws on the lowest boards. I had to remove a considerable number of rocks and dig into clay soil – issue may not affect you. Having this area flat and free of stones will be a huge timesaver later when you start putting boards on the ground, checking for level, and assembling things together.
Cutting:
You need to keep track of your cuts by labeling each with a pencil – there are quite a few pieces involved here. The instructions clearly lay out what boards should be cut to what length or width. Some of them are assembled together to make the upper trellis sections. Read the instructions carefully – not all sections are depicted in the guide with dimensions. Instead, it effectively states to “build another section like the above.”
Wood and Tools:
I acquired pressure treated pine lumber locally per the list supplied in the online description for the kit. Recommend you do this as it is a lot of wood and delivery to your driveway is recommended. As for tools, I had most of the tools available to rip 2×4 lumber into 2x2s. I chose to rent from Home Depot a 12″ sliding mitre saw station for about four hours to cut up the long lumber. It was a real timesaver because I could load a whole 2×10 or 2×4 and have it supported to measure and cut. My 10″ drop saw did not have the cutting capacity either. The last thing you will need for assembly is a framer’s square and a set of four squeeze/quick clamps (e.g. Irwin) to help with assembling the trellis sections, and then to build the base in your preferred location. It would not have been possible without it.
You will be cutting a lot of pressure treated lumber – invest in a better-than-foam breathing mask and you can cut for hours without any effects.
Assembly:
The supplied screws and brackets are of good quality and finish. I will state again to read the instructions carefully to ensure you are cutting boards to the proper length per the cut list, labeling them, and assembling them in the right order. Some of your boards will be warped and you have to do your best when stacking them. Labeling every board, while an extra step, will help you later.
After assembly of the base 2x10s at your site location, measure the diagonals to check for square. This is an important step because it is perhaps the last opportunity to do so and it will assist you later when installing the upper sections. It was here that I also took the action to line the inside with a heavy duty plastic with staples. I had to do a tradeoff here between pressure treated chemical leaching or plastic.
This is not an issue with cedar or redwood but you have to pay for it. The side benefit of the plastic was that it closed any gaps that existed because of the warped wood.
I would recommend putting your soil in BEFORE you attach the upper sections of the garden. It just makes it harder to actually get the soil into the garden with the sides installed. However, you should install the “BR” parts before the soil goes in. I completely forgot to install the BR pieces.
Post assembly:
Site prep:
In addition to leveling the area, and as recommended in the instructions, I elected to put down a 1/2″ galvanized hardware cloth/net on the ground to prevent moles from digging underneath, perhaps extreme as my clay soil is harder than concrete. I used galvanized garden stakes to hold down the net. I currently have the garden filled with a mix of vermiculite, compost, and peat moss per SFG Mel’s Mix. I did not purchase the auto watering kit so I cannot comment on the installation or use of that.
Additional items for the kit that would be nice:
– Some sort of bird netting to drape over the top – and perhaps some structure to support it. I went with BirdX – you need at least 96 sq ft. Another approach would be to pull fishing line across the top spaced about a foot or so apart.
Josh B (verified owner) –
This was a “quarantine project’ and I am very glad I found these kits. I had always wanted a garden but have tons of deer and wildlife, so not having a fully fenced property made that difficult. After years of wanting a garden I came across this kit and it was the perfect solution for my animal-proof needs. The building and assembly part was fairly straightforward. As this is a large garden with multiple levels of boards, making sure everything is square and level will definitely take some finessing if your build spot isn’t perfectly level. My build spot was close to level so we opted to assemble the bottom level of boards, dug a small trench along the sides of the garden making sure our trench was leveling, and then sliding the garden into place. Since we moved the garden we re-squared and kept building at this point. In the end most of the sections are level and square with some exceptions here and there that I’m fine with.
For filling I used about 5 yards of 50% compost/50% topsoil and mixed some amendments into the top layer.
I found all the hardware that comes with the kit to be high-quality. Can’t wait to taste the results of our hard work!
If I did this again, what would I do differently?:
– Another reviewer mentioned filling the garden before putting the fences up. I also thought about this but ended up putting the fences up first. In hindsight I should have filled first because taking ~5 yards of dirt through the opening was a lot of work (I did at least wait until it was filled to put the door on).
What did I add?
– I ended up buying the watering kit after I was almost fully assembled. I was envisioning the hassle of dragging a hose through the door every day and that thought was not appealing. The water kit is pretty slick in terms of I can quickly hook up a hose via quick-release and be watering immediately; or leave it connected with the irrigation timer watering a couple times a day if we are gone.
– I couldn’t believe how expensive the gopher wire mesh products were so I used some wire fence I had laying around and doubled it up in places to make the openings tighter. It is not nearly as ideal as the gopher mesh products but it is better than nothing.
– I also decided to fill the standing area of the garden with about 2” of 5/8 minus gravel. The final part for this was building a little gravel landing for the door edged with a blue stone. That part turned out very nicely.